
Wire EDM machines are easy to get started with, but stable machining requires proper basic procedures. This guide covers three essentials: the operating sequence, limit stops and wire changing, and handling a broken wire.
1. Five-Step Operating Sequence
- Switch on the main power, controller, 24V stepper drive and high-frequency pulse power supply.
- Program coordinate points from the drawing and the workpiece, considering clamping and wire diameter, and choose a sensible entry position.
- Start the wire feed motor, pump motor and the high-frequency switch on the control panel.
- Set coarse adjustment to automatic, engage the feed switch and machine; fine-tune for the most stable condition.
- When finishing, switch off the high-frequency supply and pump first, then the spool switch. On braking models, press the red main-power button.
Pre-start checks: confirm electrical parts are secure, wire tension correct, guide wheels undamaged, the wire deflector groove sound, and oil at lubrication points.
2. Limit Stops and Wire Changing
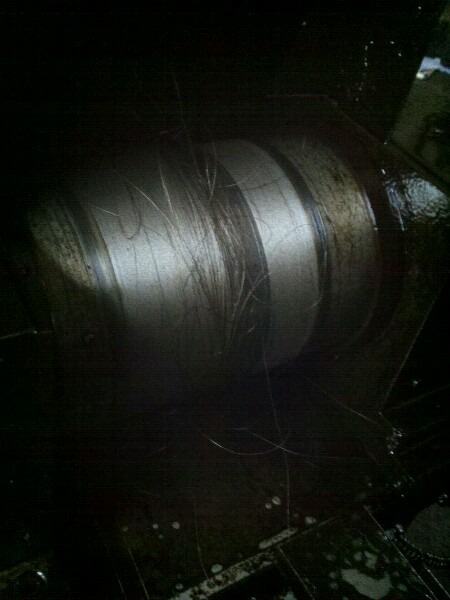
How limit stops work. The wire is wound on the spool with its edges about 10mm from the screws on each side. When the spool reaches a limit stop, its plunger presses the button, halting travel and reversing it; repeated reversal keeps the cut going. The middle button is the stop key.
Changing the wire. Remove the old wire and clean the screw gaps. Loosen the screws, push both limit stops to the ends and start the spool; stop when the left screw is 3–5mm from the guide wheel. Wrap the new wire end around the left screw, tighten, feed it under the guide wheel and turn the spool by hand about ten turns for inertia margin. Set the left limit stop. Load the wire at minimum spool speed, holding the supply spool with even force; stop when the wire is 5–7mm from the right screw, wrap and tighten. Thread the wire over and under the guide frame, back to the spool; turn the spool upward about ten turns and set the right limit stop. Finally, tension the wire.
3. Handling a Wire Break
Quick recovery. After a break, keep the stepper motor engaged, remove the waste wire on the shorter side and reposition the rest on the spool.
Re-threading. Clean the workpiece and wet the slot with kerosene, add a drop of oil at the break point, and harden a pointed wire tip in a flame. Feed it through the slot with tweezers, 2–3mm at a time. If the slot has closed, polish the passing section with fine sandpaper.
4. Why Wire Breaks — A System View
Breakage usually starts with unstable machining: discharge concentrates at one point, the energy overheats the wire locally and melts it. Preventing breakage means stabilizing the process quickly. Key factors:
- Pulse power supply should keep wire loss low.
- Cooling: poor flushing leaves the wire uncooled and it burns — check before cutting.
- Wire feeding mechanism: wire vibration like a spindle (larger in the middle) exceeds the elastic limit; use quality feed components and constant-tension wire.
- Tension: too loose vibrates and breaks, too tight snaps from stress. Tension new wire before cutting, retighten slack during machining, leave 10mm at each spool end and wind the middle without overlaps.
- Wire deflector: ruby guide columns wear from sliding friction; rotate or replace them once a deep groove forms.
- Workpiece: temper non-forged, non-quenched materials before cutting to relieve stress; quenched T8 steel breaks easily — use sparingly; clamp firmly.
Summary: The operating sequence, limit stops, wire changing and breakage handling are the three fundamentals for beginners. Understanding the system-level causes keeps production stable and cuts wire losses.
Need more information? — we reply within 24 hours. Contact our sales team