
Marks (a groove, line or ridge) at the lead-in point of a wire EDM cut are common. In theory they cannot be completely avoided, only minimized — the problem is most visible on single-pass cuts, and multiple cut passes largely solve it.
1. Three main causes
- Excessive or uneven XY backlash. If the gap between the stepping motors and lead screws on the X and Y axes is too large, or differs between the two axes, the lead-in shows up more clearly. Adjust the gear backlash by feel: both axes should have a small, equal amount of backlash, and each lead screw should show uniform backlash over a full 360° rotation.
- Material deformation. Distortion of the workpiece makes lead-in marks more obvious. A suitable lead-in and lead-out path, with the entry point repositioned in the part program, handles most cases for standard and high-precision parts.
- Wrong fluid ratio. A concentration that is too low, poor flushing and weak discharge all make lead-in marks worse. Check the dielectric fluid concentration and adjust the mix.
2. Solutions
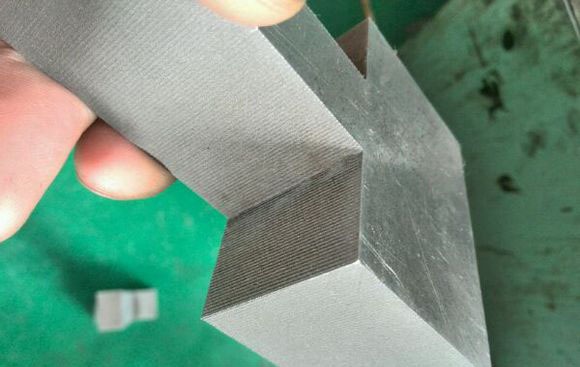
- Multi-cut passes: the most effective fix when a single pass leaves a clear mark at the lead-in.
- Corner cleaning: after the above issues are ruled out, enabling the corner-cleaning function for about five seconds at the lead-in and lead-out greatly improves the result.
- Balanced backlash: adjust the gear backlash on both axes so it is even and consistent.
- Optimized path: modify the lead-in/lead-out path and entry point to reduce the effect of material deformation.
3. The ridge at the lead-in/lead-out intersection
A raised ridge often remains where the cut starts and the finish point meets:
- Medium- and low-speed wire EDM: generally not a problem. MS-WEDM machines have an overcut function — when a ridge appears, an overcut of about 0.3mm removes it.
- High-speed wire EDM: the ridge is essentially unavoidable. The entry point leaves a line, and the material distorts around the full cut; the ridge can be made smaller but not eliminated. If steel leaves a ridge, copper will be worse.
- Finishing options: grind the ridge off with a file or belt sander; where a clean, headless finish is required, clamp and re-cut the lead-in area to remove the stub (note that this roughly halves success on dropped parts — fine for holes); or cut slightly oversize and grind on a centerless grinder.
Summary. Troubleshoot lead-in marks from three angles — backlash, material deformation and fluid ratio — and combine multi-cut passes with corner cleaning for a clear improvement. On high-speed machines the intersection ridge cannot be fully removed; use grinding or process adjustments instead.
Need more information? — we reply within 24 hours. Contact our sales team